PrivateDonut
Account Closedbanned
LEVEL 31
71 XP
Welcome to my step-by-step tutorial on how to compile Trinity Core 3.3.5a on Debian 11.
Logging Into the server:
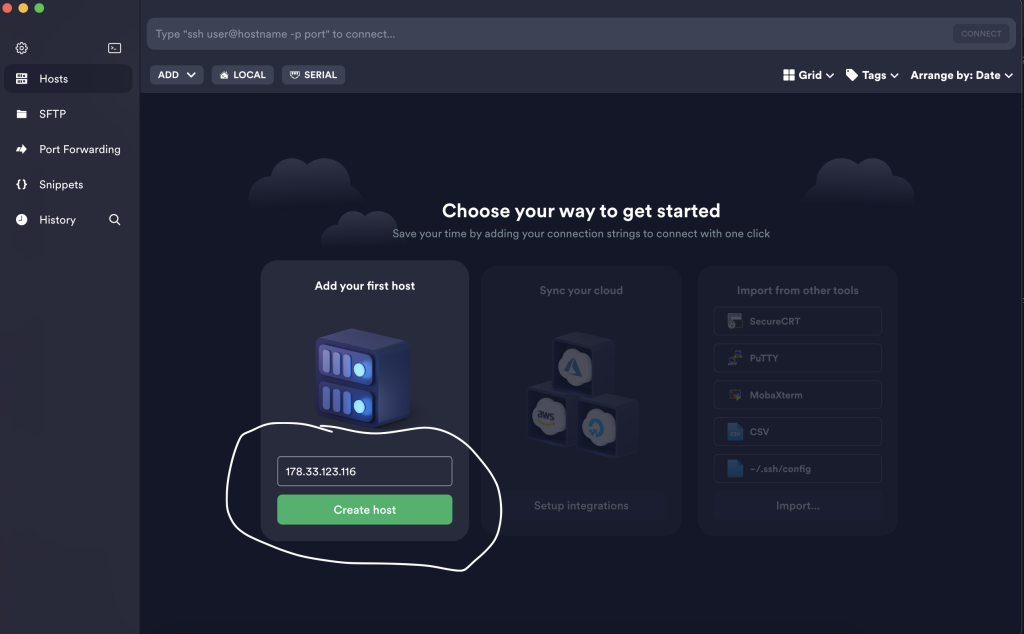
You’ll need to enter your server IP into the field shown in the circle and click Create host.
Once you created the host, you’ll see the following screen where you’ll need to enter your username and password to connect to your server.
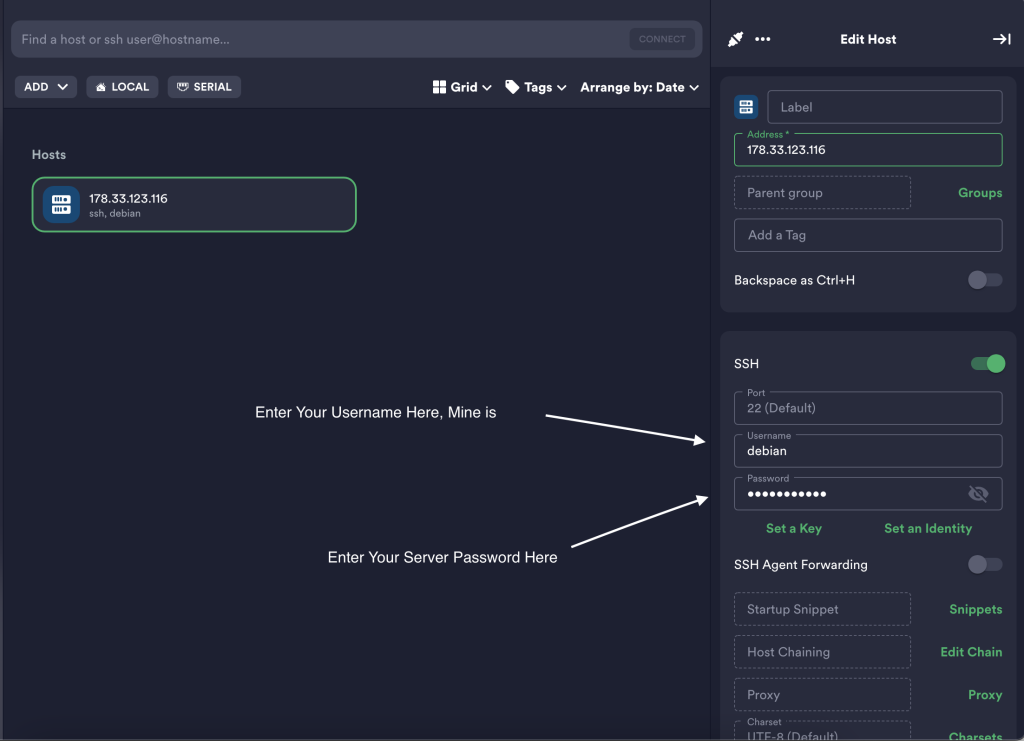
Once you have configured your username and password, simply double-click the host you just created to login into the server via ssh.
Now you’d need to give this newly created user sudo permissions in order to follow along with this tutorial.

Now let’s switch over to the new user we just created and gave sudo permissions. Use the password you decided on when creating the user.

Now you’ll want to change to your Directory that belongs to this user.
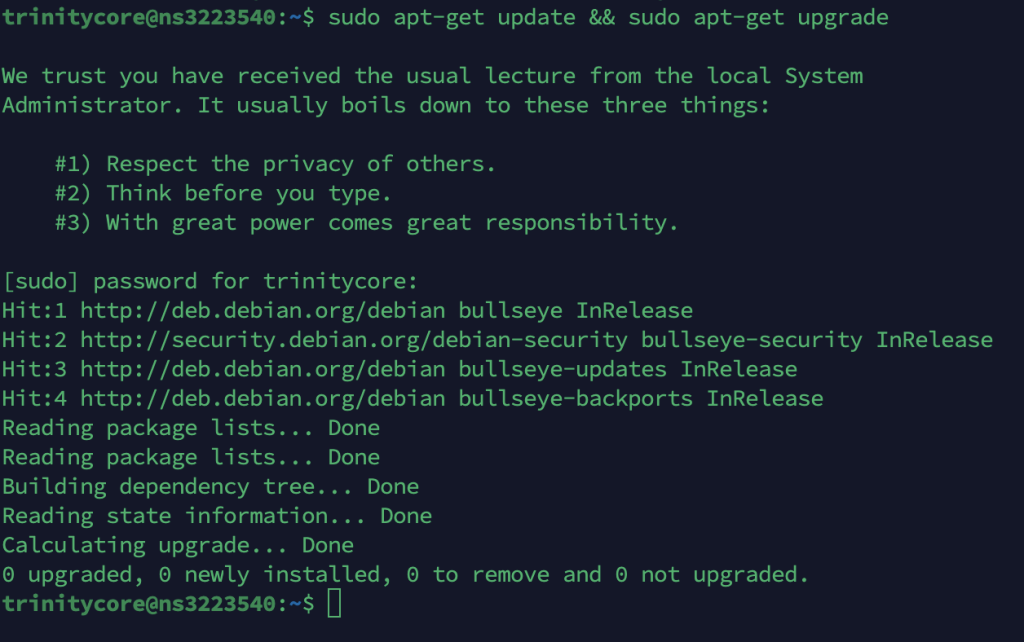
sudo apt-get update && sudo apt-get upgrade
Now that your server is updated, you are ready to install the required software to compile trinity core.
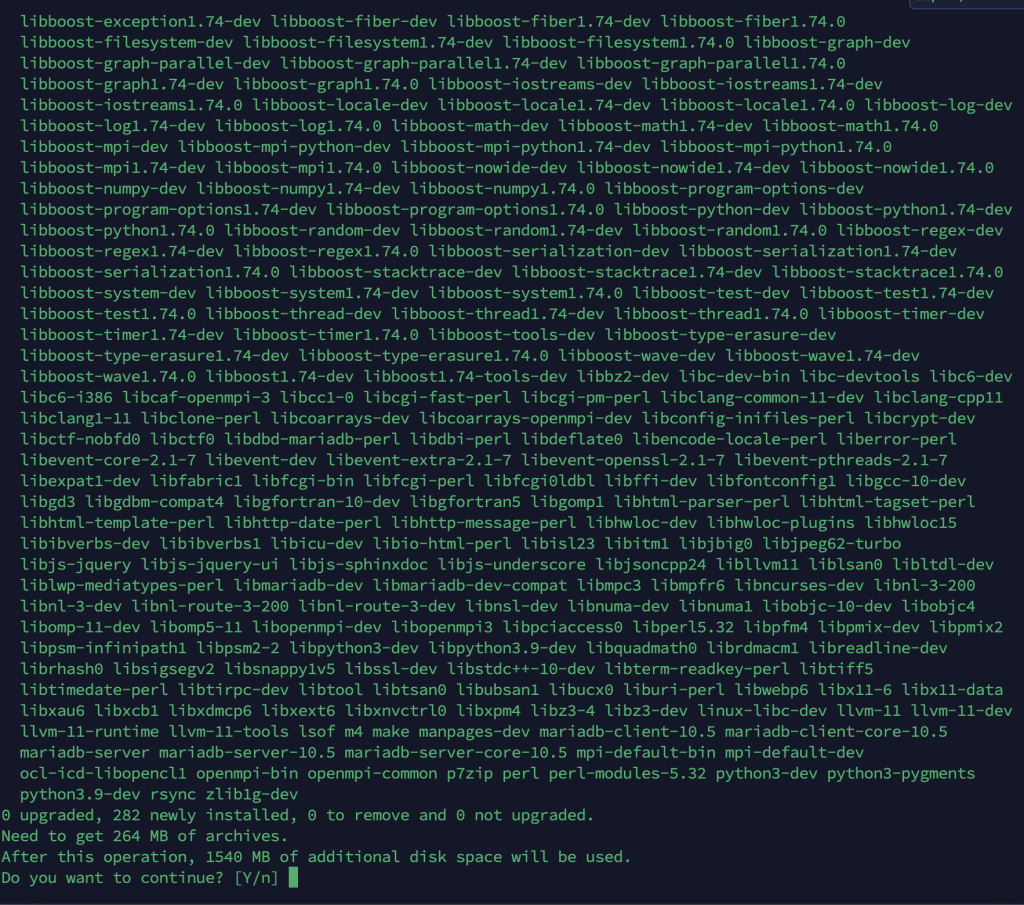
Enter ‘Y’ and the installation process for the software may take a moment to complete.
We will know go to the trinity core folder just cloned and make a build directory.
Before we begin the compilation process, we need to determine the number of cores in our CPU. As shown in the example below, my server has 8 cores. However, the number of cores on your server may be different, so use the number that corresponds to your server.

We are now ready to use cmake to prepare the source code. The command below will set the server directory to /home/trinitycore/Server.

Remember the number of cores in your CPU. You will need to input that information here by replacing ‘X’ with the number of cores. For example, if your server has 8 cores, you would enter ‘8’

Step 1: Requirements To Begin
- Access to Debian 11
- Termius
Step 2: Logging Into Debian via Termius
If you already know how to connect to your server via ssh, you can skip this part. I decided to use termius for this tutorial simply because it is cross platform and anyone can follow along with this tutorial. Now that you have all the tools needed to follow along with this tutorial, let’s begin.Logging Into the server:
You’ll need to enter your server IP into the field shown in the circle and click Create host.
Once you created the host, you’ll see the following screen where you’ll need to enter your username and password to connect to your server.
Once you have configured your username and password, simply double-click the host you just created to login into the server via ssh.
Step 3: Creating A User
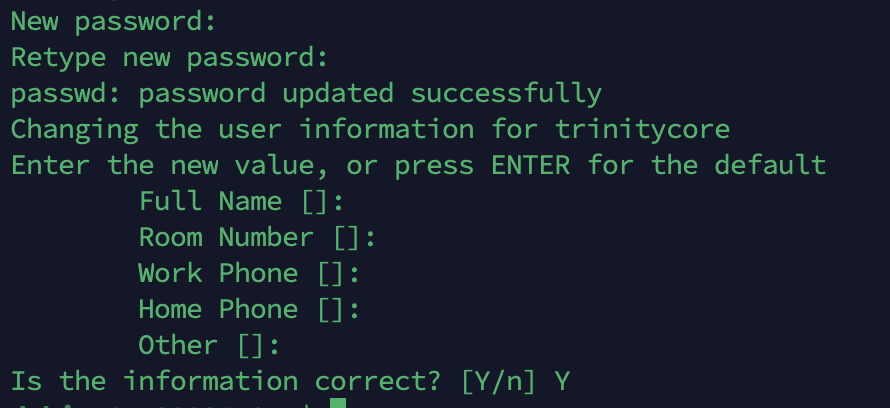
Let’s create a separate user, we will use to compile and manage our trinity core server from. We will call this user trinitycore for the sake of this tutorial, but you can name it whatever you’d like.sudo adduser trinitycore

Now you’d need to give this newly created user sudo permissions in order to follow along with this tutorial.
sudo usermod -aG sudo trinitycore
Now let’s switch over to the new user we just created and gave sudo permissions. Use the password you decided on when creating the user.
Now you’ll want to change to your Directory that belongs to this user.
Please be aware that it is generally considered best practice to avoid using the root username and to refrain from granting sudo permissions to new users, as they are not usually necessary. However, for the purposes of this tutorial, I have demonstrated how to do so.cd /home/trinitycore/
Step 4: Updating The Server And Installing Required Tools
Now you are ready to update your server and install the required tools to compile trinity core.sudo apt-get update && sudo apt-get upgrade
Now that your server is updated, you are ready to install the required software to compile trinity core.
sudo apt-get install git clang cmake make gcc g++ libmariadb-dev libssl-dev libbz2-dev libreadline-dev libncurses-dev libboost-all-dev mariadb-server p7zip default-libmysqlclient-dev p7zip-full
sudo update-alternatives --install /usr/bin/cc cc /usr/bin/clang 100
sudo update-alternatives --install /usr/bin/c++ c++ /usr/bin/clang 100
Enter ‘Y’ and the installation process for the software may take a moment to complete.
Step 5: Cloning Trinity Core From Github & Compiling
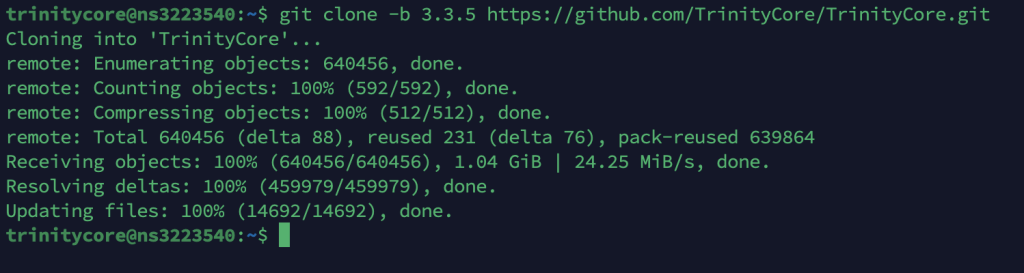
Now that you have the necessary tools for the job. You can clone TrinityCore from GitHub.
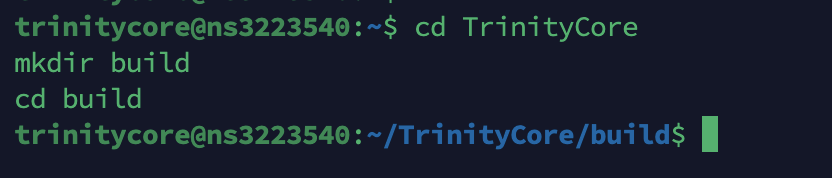
We will know go to the trinity core folder just cloned and make a build directory.
cd TrinityCore
mkdir build
cd build
Before we begin the compilation process, we need to determine the number of cores in our CPU. As shown in the example below, my server has 8 cores. However, the number of cores on your server may be different, so use the number that corresponds to your server.
nproc --all
We are now ready to use cmake to prepare the source code. The command below will set the server directory to /home/trinitycore/Server.
cmake ../ -DCMAKE_INSTALL_PREFIX=/home/trinitycore/Server -DTOOLS=0
Remember the number of cores in your CPU. You will need to input that information here by replacing ‘X’ with the number of cores. For example, if your server has 8 cores, you would enter ‘8’
You are now compiling trinity core. This may take awhile depending on the resources available on your server.make -j X
sudo make install
Last edited:


")